2.8 KiB
How to disable IPv6 on iOS (cellular-only) and macOS and why it’s a big deal for privacy
Heads up: unfortunately this guide will not work on carriers or ISPs that have migrated their networks to IPv6-only.
iOS guide
Step 1 (macOS): download and open Apple Configurator 2
Step 2 (macOS): create new profile using cmd + n
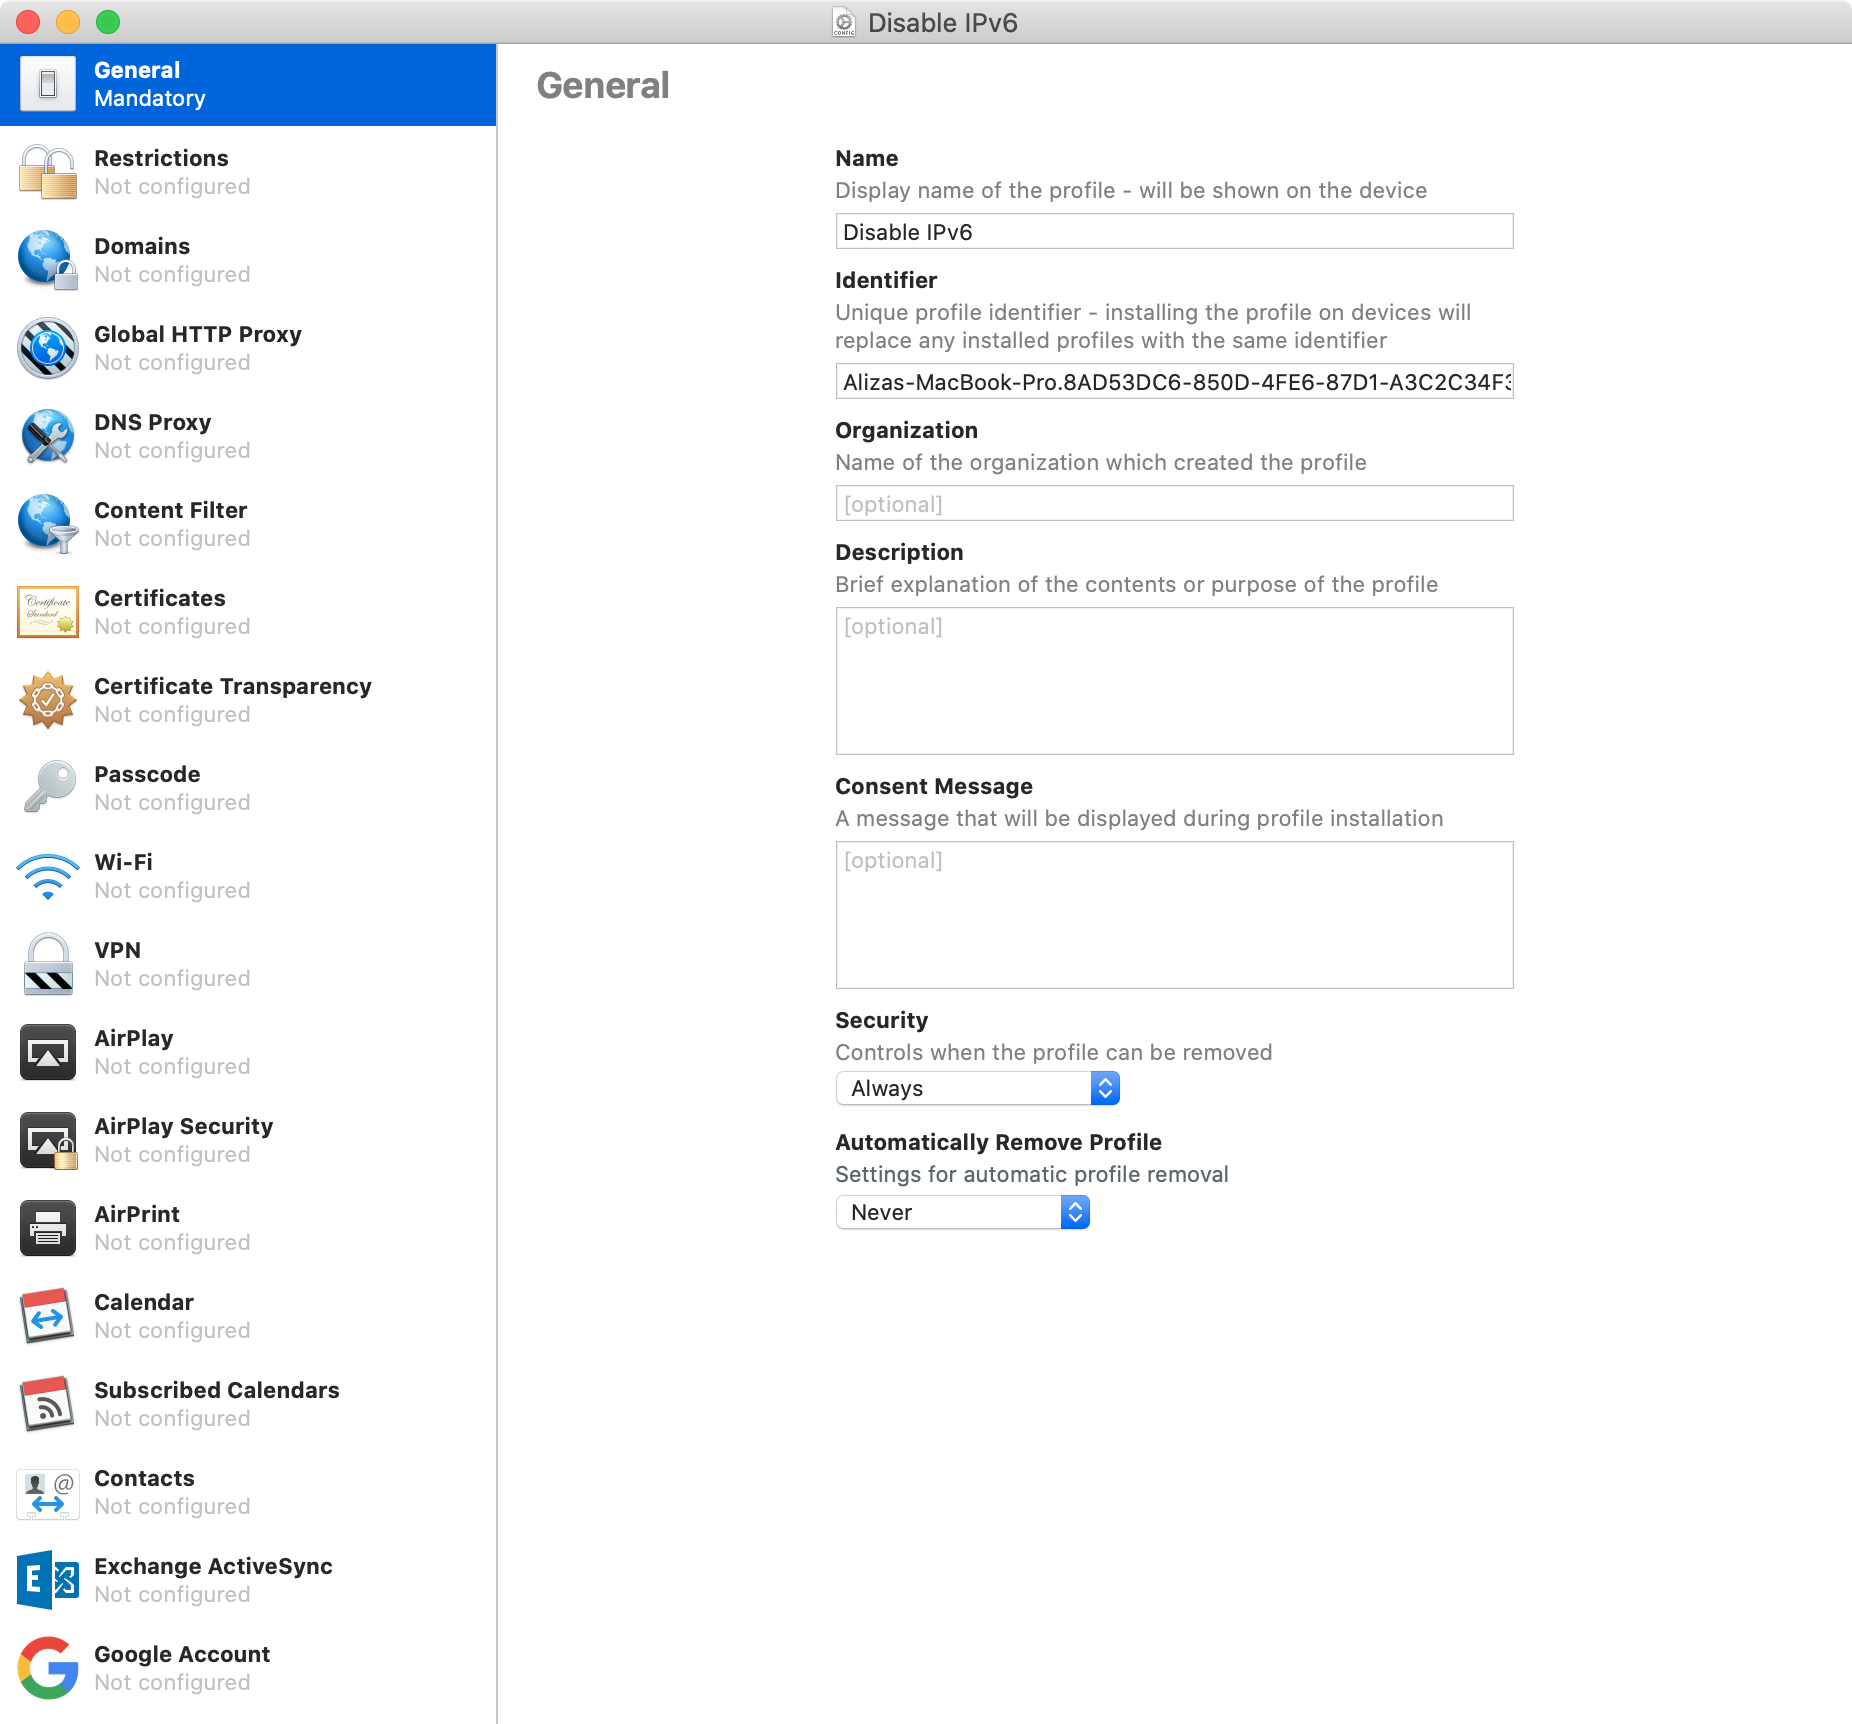
Step 3 (macOS): configure "General" settings
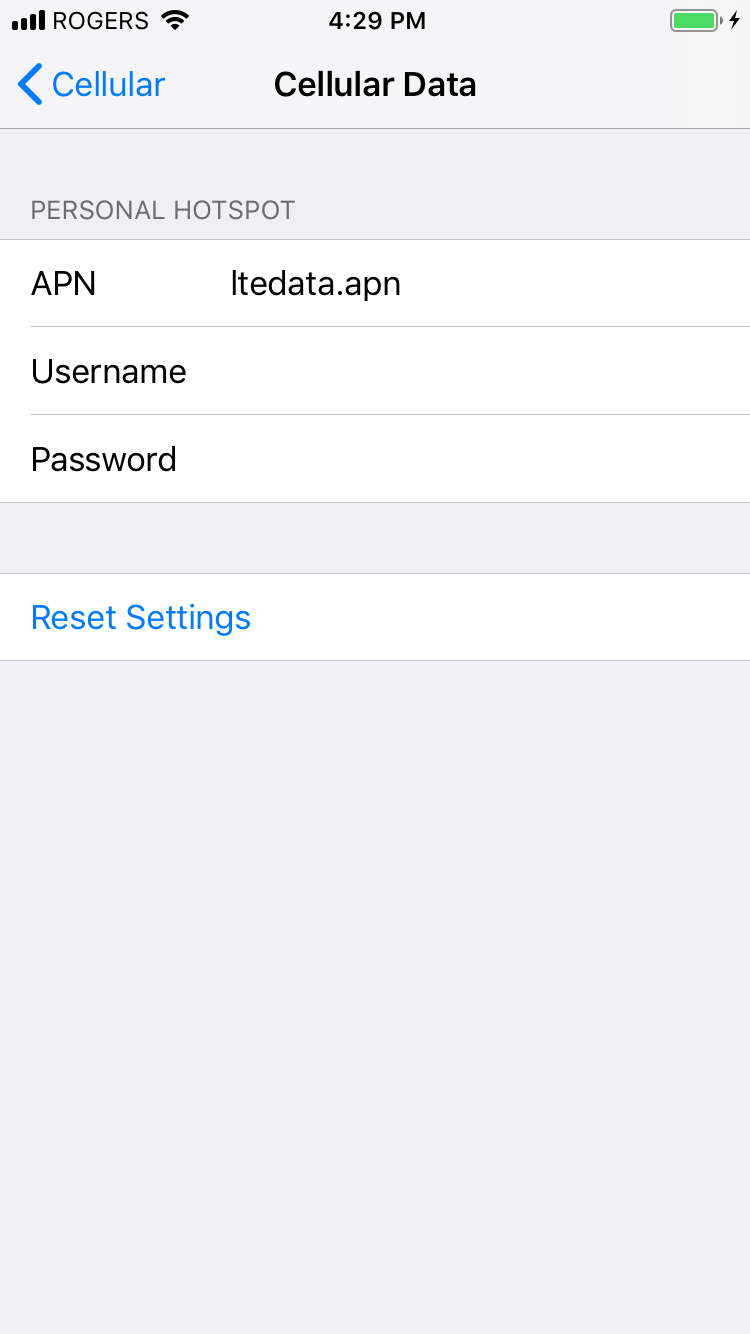
Step 4 (iOS): find your APN settings
Open "Settings", then "Cellular", then "Cellular Data Network".
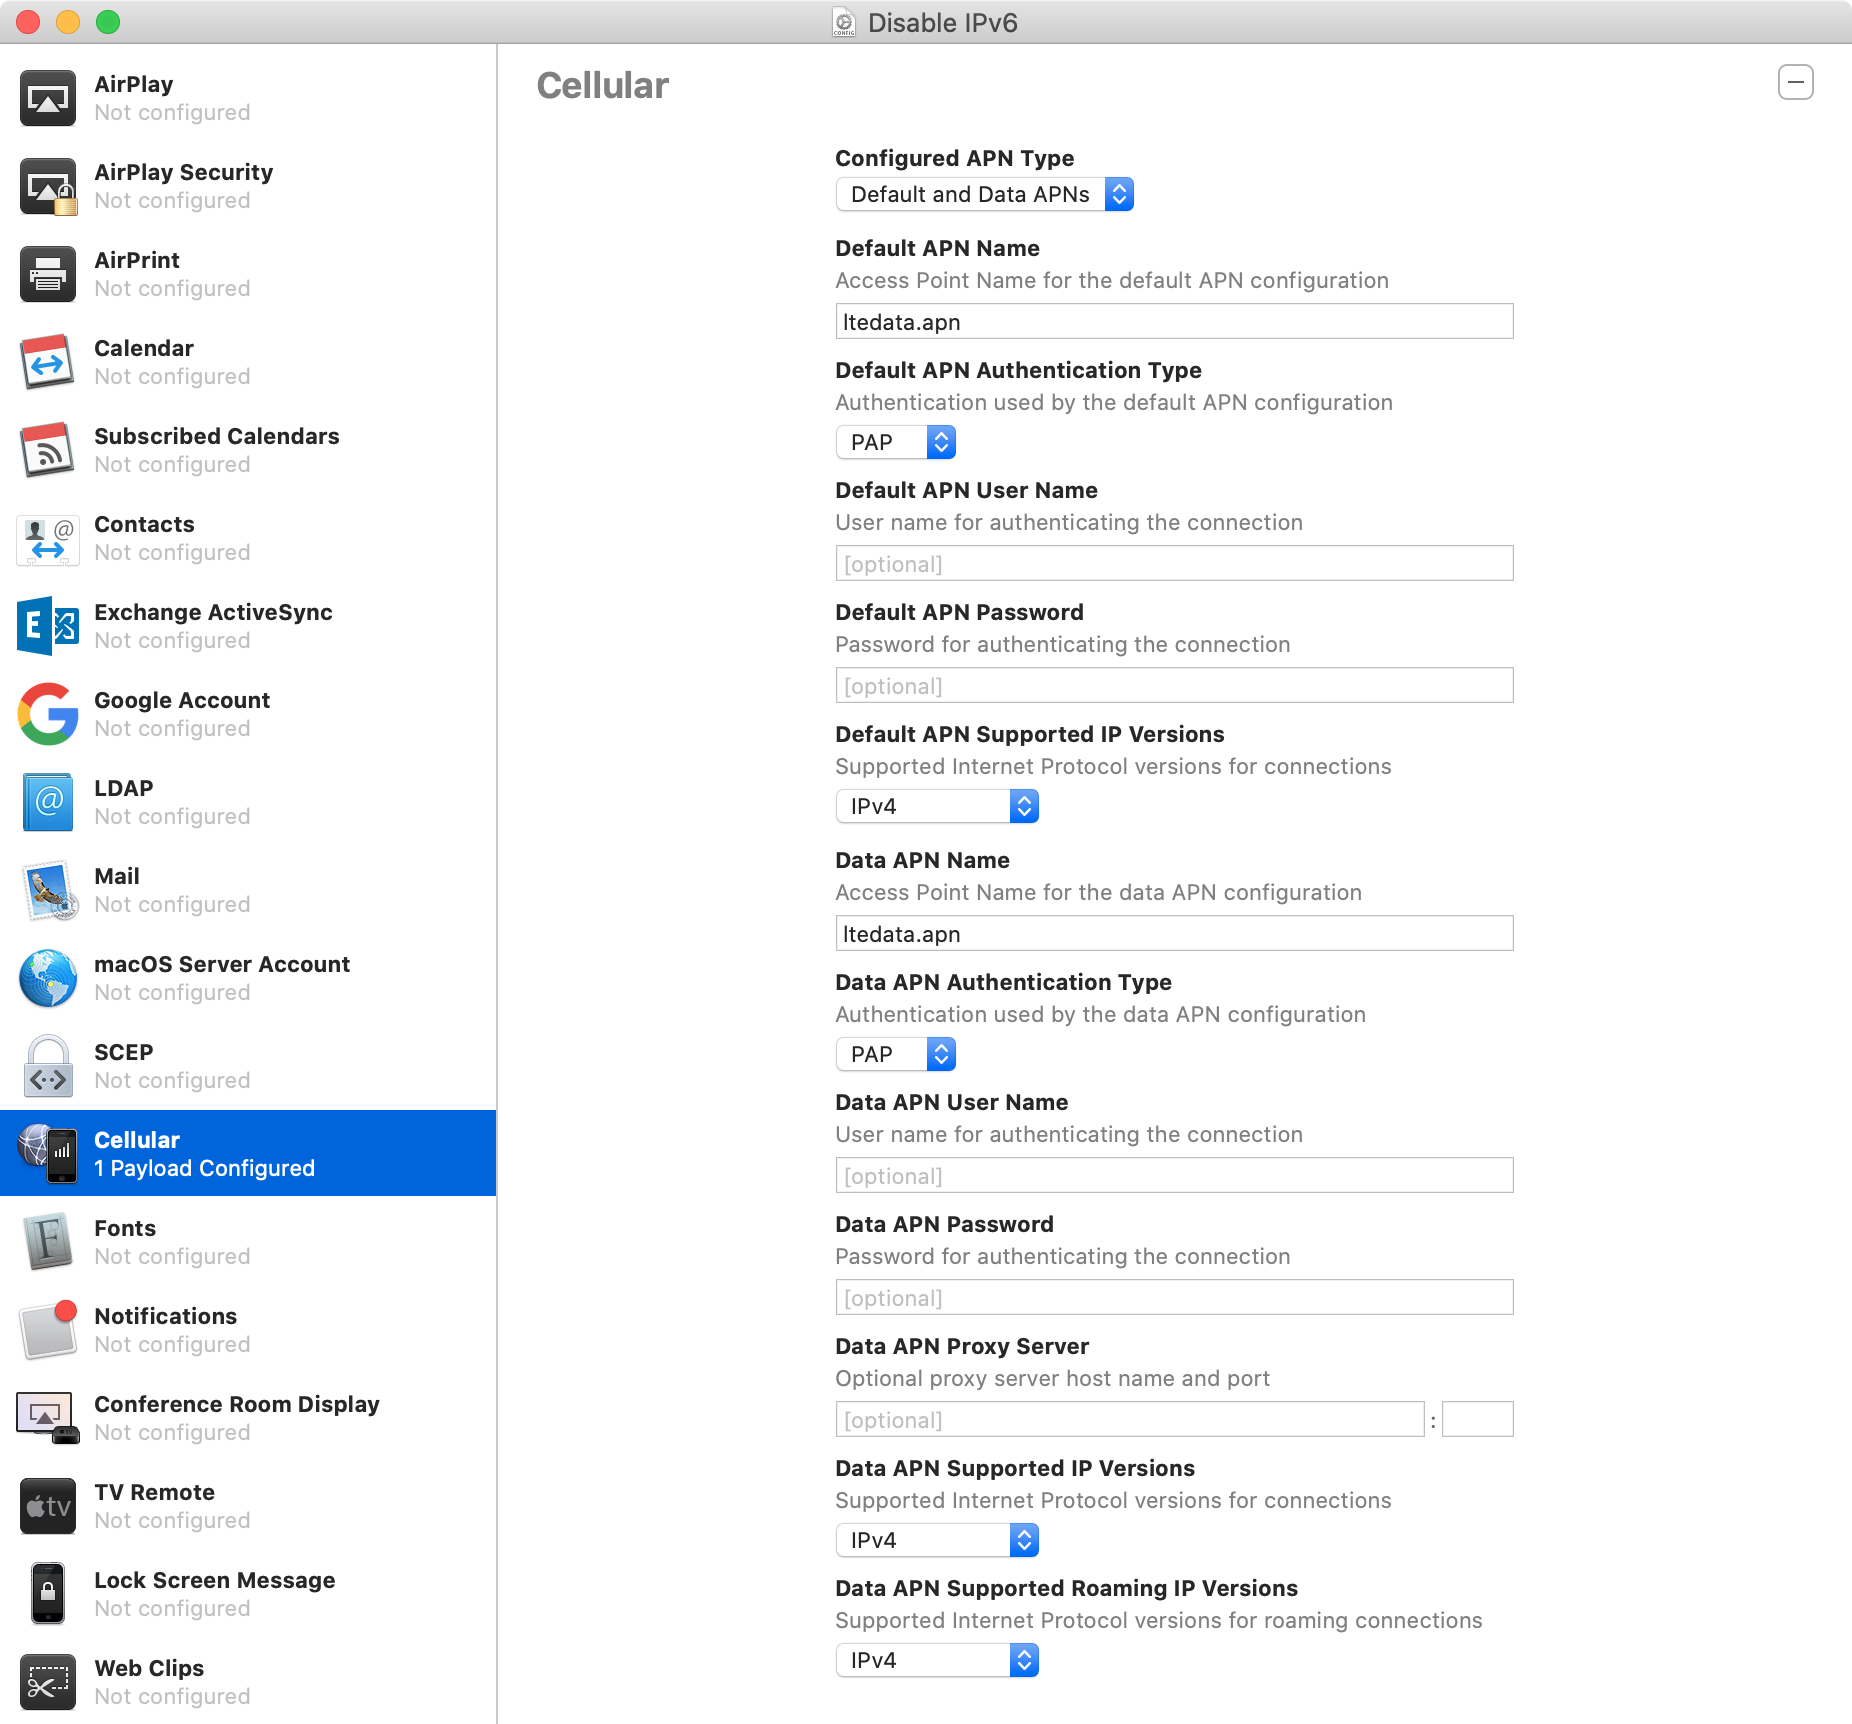
Step 5 (macOS): configure "Cellular" settings
Step 6 (macOS): save provisioning profile
Step 7 (macOS): connect iPhone to Mac
Step 8 (macOS): double-click on iPhone

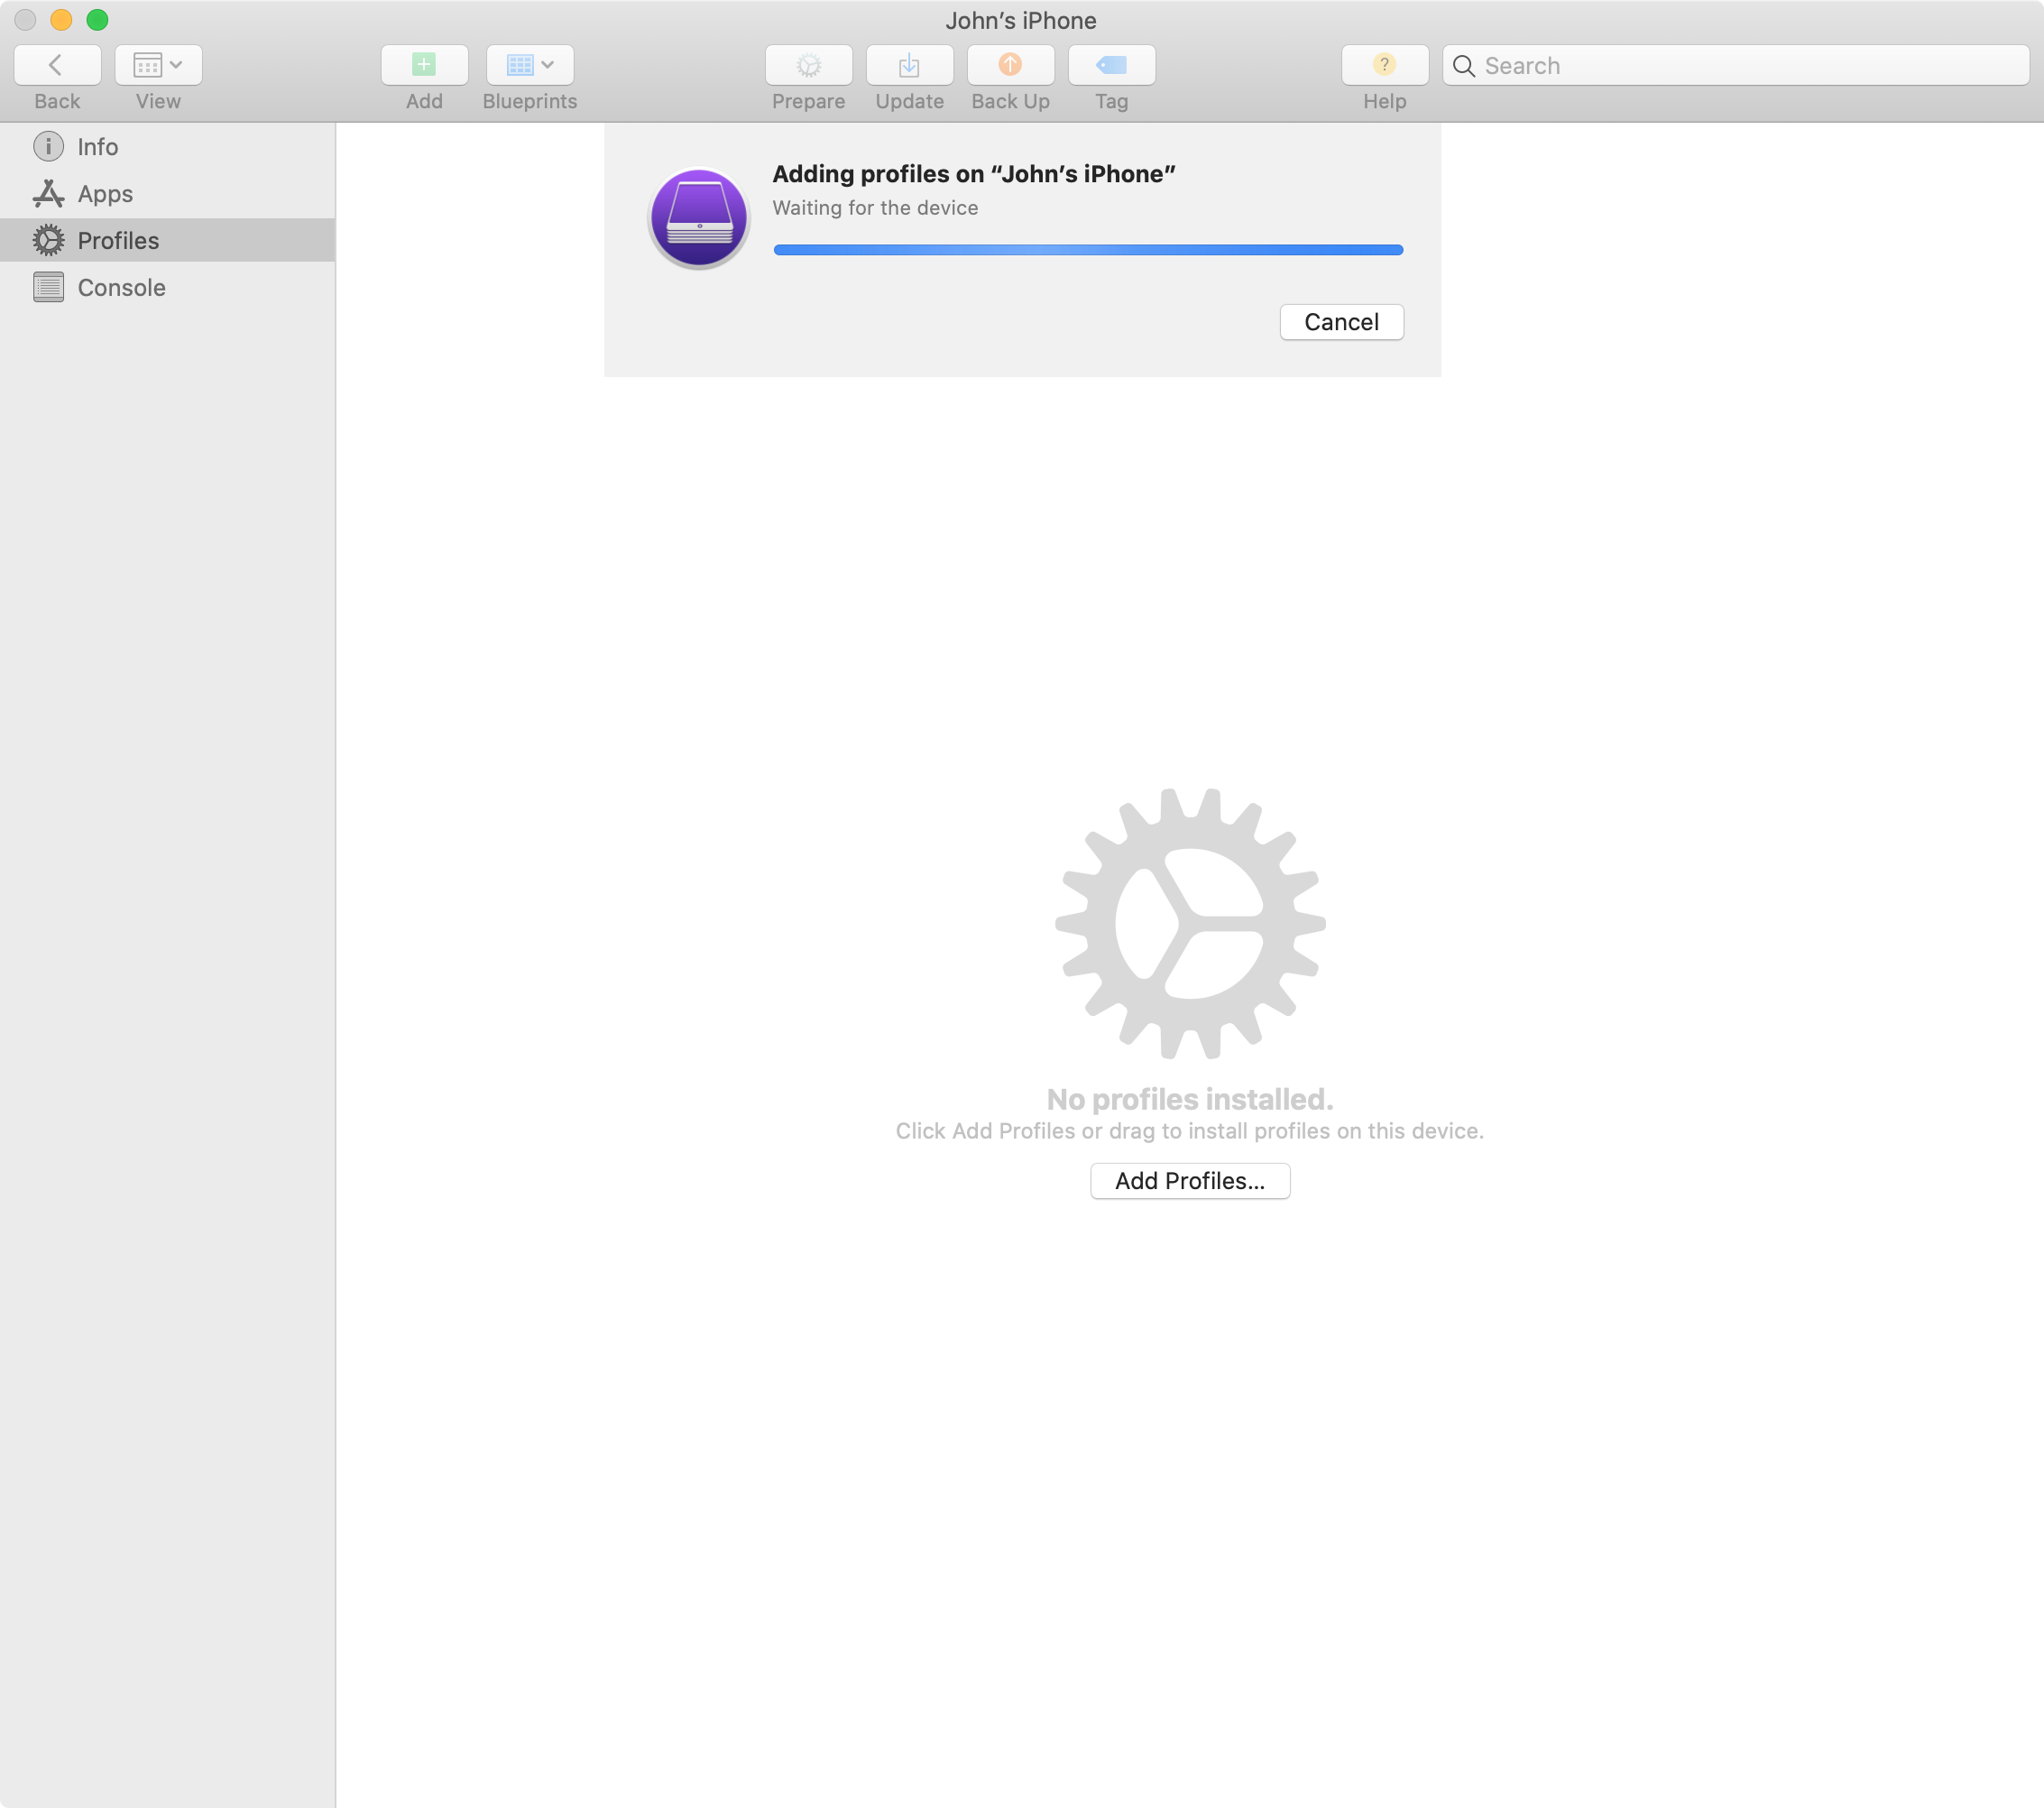
Step 9 (macOS): click on "Profile" tab, then "Add Profiles...", select saved provisioning profile and click "Add"
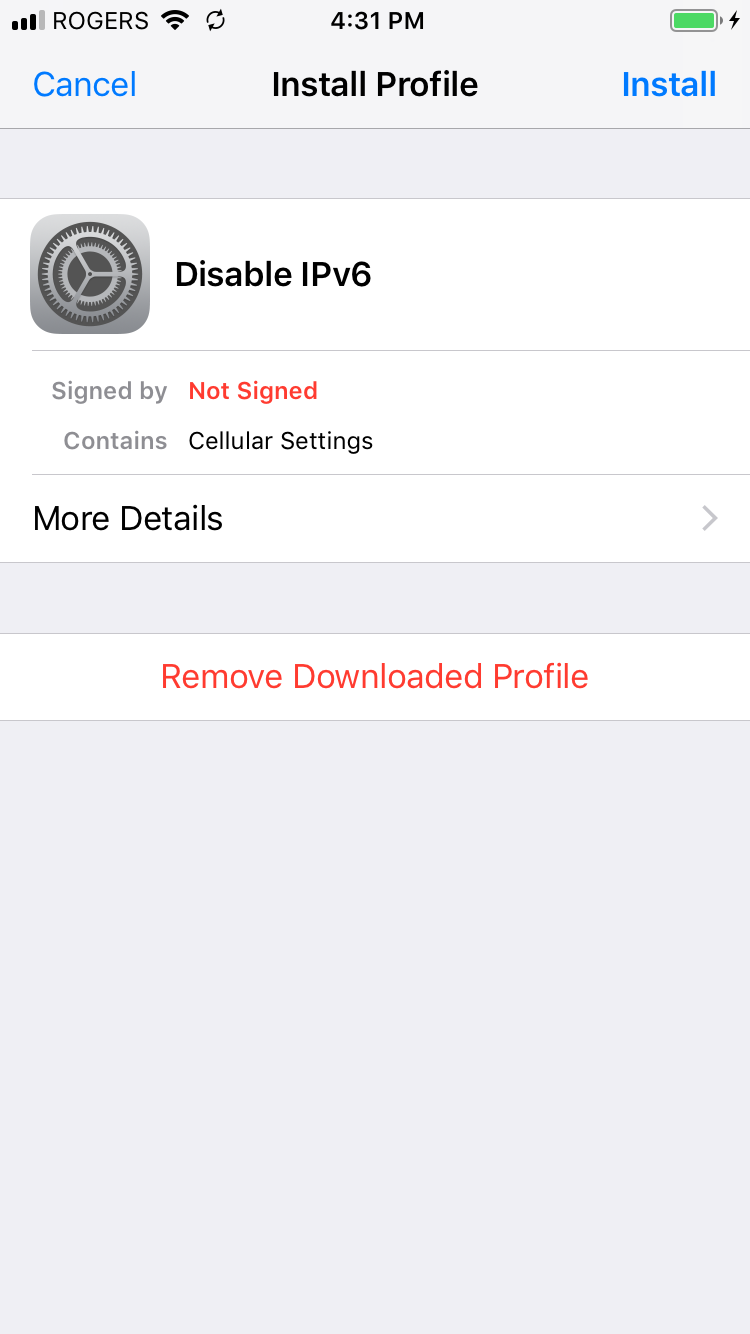
Step 10 (iOS): review profile
Open "Settings", then "Profile Downloaded" and tap "Install"
macOS guide
Step 1: list network interfaces
networksetup -listallnetworkservices
Step 2: disable IPv6
networksetup -setv6off "Wi-Fi"
networksetup -setv6off "Thunderbolt Ethernet"
Want things back the way they were before following this guide? No problem!
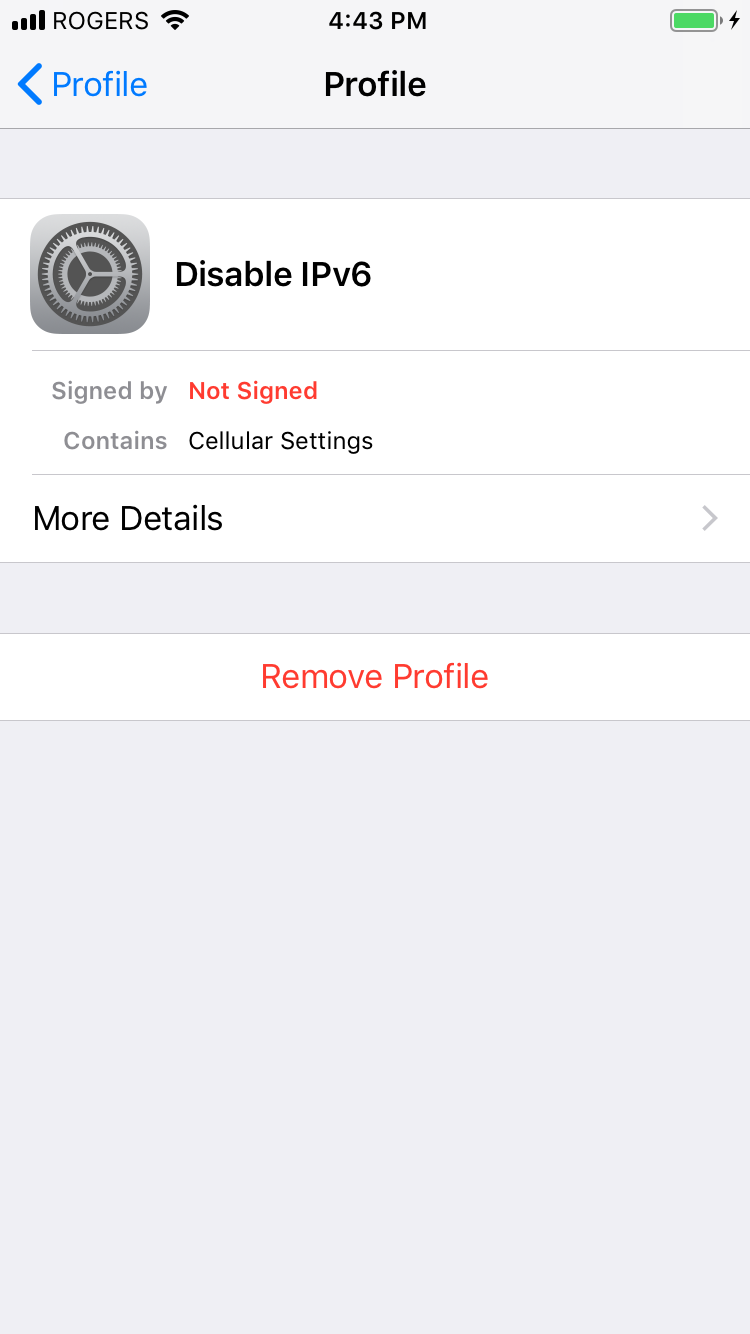
Step 1 (iOS): remove provisioning profile from iPhone
Open "Settings", then "General", then "Profile", tap on your provisioning profile and tap "Remove Profile".
Step 2 (macOS): set network interfaces to automatic
networksetup -setv6automatic "Wi-Fi"
networksetup -setv6automatic "Thunderbolt Ethernet"