22 KiB
How to self-host a hardened Borg backup server and configure macOS client
Requirements
- Virtual private server (VPS) or dedicated server running Debian 10 (buster)
- Computer running macOS Mojave or Catalina
Caveats
- When copy/pasting commands that start with
$, strip out$as this character is not part of the command - When copy/pasting commands that start with
cat << "EOF", select all lines at once (fromcat << "EOF"toEOFinclusively) as they are part of the same (single) command
Setup guide
Step 1: create server SSH key pair (on Mac)
When asked for file in which to save key, enter server.
When asked for passphrase, use output from openssl rand -base64 24 (and store passphrase in password manager).
Use server.pub public key when setting up server.
$ mkdir -p ~/.ssh

$ cd ~/.ssh

$ ssh-keygen -t rsa -C "server"
Generating public/private rsa key pair.
Enter file in which to save the key (/Users/sunknudsen/.ssh/id_rsa): server
Enter passphrase (empty for no passphrase):
Enter same passphrase again:
Your identification has been saved in server.
Your public key has been saved in server.pub.
The key fingerprint is:
SHA256:rZFDBWi8f6BcRR2gqzIWmWtBiLdk89znOSpZkZGOQH8 server
The key's randomart image is:
+---[RSA 3072]----+
| ..  . o.o+o..   |
| ..o  *  o. .    |
|. *.o+E+o.       |
| + *.==.o+       |
|  . B..=S..      |
|     +++.=.      |
|    *o. =.       |
|   ooo . .       |
|     ..          |
+----[SHA256]-----+

$ cat server.pub
ssh-rsa AAAAB3NzaC1yc2EAAAADAQABAAABgQCowL4nNnu5Ca3ixlMxD6vVUexhx7M214ElheY/Y3K1mGavd5H6ynhkF71DAgI3YOB3B9KM/IzvV+8ioY+FUVlovBrKwqXzBwb5fnAGPjymjRMY93nYVExICHjI6aQX+9CG1WxRMPhZpDo51sKXORpWQDbMG+CfDa5nmjVjysoCdqwJfd22WEDFIXTiUdVXC5EvJBWiC0MUAphRPmNF/fXyaZPoiL1RmNX7h6JsMQJC/iWHwYgQZhzQCuoAOnvEXKUnu6s7FEUOSbqHCnOuHzxVkDHg1yy667hhyOuwkPdUW276T44GgwicSg/T2IWmwf5cBmDzaSr21kaM00zeg+stqkIwKqdpd0PhV8tjIdKCm3H9GsCRpE0erXLhJVsQTjmmFaodvFyroRHeyH9VBqzYrJXMhG/iXwK8uCeOwGFUosddYw3jJ3sLgsRI34oGKSq9HIRd7P5gdxUZ8cJiZUCpfS4vI4cZDkyR5D8Xvupe/X2pS5Llc8wtiy1K3nxIEQE= server
Step 2: create borg SSH key pair (on Mac)
When asked for file in which to save key, enter borg.
When asked for passphrase, leave field empty for no passphrase.
$ ssh-keygen -t rsa -C "borg"
Generating public/private rsa key pair.
Enter file in which to save the key (/Users/sunknudsen/.ssh/id_rsa): borg
Enter passphrase (empty for no passphrase):
Enter same passphrase again:
Your identification has been saved in borg.
Your public key has been saved in borg.pub.
The key fingerprint is:
SHA256:ZB293/YueacLtg2a5anHe/PXruP8YwZXwU/caebReSk borg
The key's randomart image is:
+---[RSA 3072]----+
|          ..  ..*|
|         . ..E X*|
|        o .  .=.=|
|       o    .  .o|
|        S    . ..|
|             ...o|
|           .= ooo|
|           *oB*+*|
|          +o=+X&O|
+----[SHA256]-----+

$ cat borg.pub
ssh-rsa AAAAB3NzaC1yc2EAAAADAQABAAABgQDawvaD0JmNz3XBChQq9OZROa0psAwH0BpHwGZ/4cuDiTnU8gt3gYXDANkS++SKbUNMJCQW3QgVNFhpk2SmWA8lLvlpuD5J3kvHNFNKFv/hBc0XxsVJlpASONeCwilnS5otIqnDT0+KFMOevZUMCumEoBtjQ3IQbGkpWgf3NJ6ysXkt6kLRk7PMls4E733v/T4XUJmeBWT6B0rECqWE3aFzrjjZbfyJho0Pp8VzjT3m4vknNCvvwionjXRti5ObvEo3OZGWQbuhwW63JPS+aldNX9Xo0VC8t2UuSzzy7OeGI+JB76Pw1RYfXaMeflHry3O50kCIWIWHPNblw0sBPBsRs9BDg4R8urwpdVYjyirw9cZHDA8lkPxh0WS3IbA7Q1iRlVrfJkm9r4SqohxwQUeHIT7lpsyDHObUDF3KejRCWtyCqabPJVHqvGIds6rjQQo9lP5JNkeHg+qg8Cw61FihGLrlFStvgx1pMbBo2TvMEsRo65psVYUyi79taqbdlZM= borg
Step 3: generate SSH authorized keys heredoc (on Mac)
Set temporary environment variable
BORG_STORAGE_QUOTA backup storage quota
BORG_STORAGE_QUOTA="10G"
Generate heredoc (the output of following command will be used at step 21)
cat << _EOF
cat << EOF > /home/borg/.ssh/authorized_keys
command="borg serve --append-only --restrict-to-repository /home/borg/backup --storage-quota $BORG_STORAGE_QUOTA",restrict $(cat ~/.ssh/borg.pub)"
command="borg serve --restrict-to-repository /home/borg/backup --storage-quota $BORG_STORAGE_QUOTA",restrict $(cat ~/.ssh/server.pub)"
EOF
_EOF
Step 4: log in to server as root
Replace 185.112.144.30 with IP of server.
ssh root@185.112.144.30 -i ~/.ssh/server
Step 5: create server-admin user
When asked for password, use output from openssl rand -base64 24 (and store password in password manager).
All other fields are optional, press enter to skip them and then press Y.
$ adduser server-admin
Adding user `server-admin' ...
Adding new group `server-admin' (1000) ...
Adding new user `server-admin' (1000) with group `server-admin' ...
Creating home directory `/home/server-admin' ...
Copying files from `/etc/skel' ...
New password:
Retype new password:
passwd: password updated successfully
Changing the user information for server-admin
Enter the new value, or press ENTER for the default
	Full Name []:
	Room Number []:
	Work Phone []:
	Home Phone []:
	Other []:
Is the information correct? [Y/n] Y
Step 6: create borg user
When asked for password, use output from openssl rand -base64 24 (and store password in password manager).
All other fields are optional, press enter to skip them and then press Y.
$ adduser borg
Adding user `borg' ...
Adding new group `borg' (1000) ...
Adding new user `borg' (1000) with group `borg' ...
Creating home directory `/home/borg' ...
Copying files from `/etc/skel' ...
New password:
Retype new password:
passwd: password updated successfully
Changing the user information for borg
Enter the new value, or press ENTER for the default
	Full Name []:
	Room Number []:
	Work Phone []:
	Home Phone []:
	Other []:
Is the information correct? [Y/n] Y
Step 7: copy root’s authorized_keys file to server-admin’s home folder
mkdir /home/server-admin/.ssh
cp /root/.ssh/authorized_keys /home/server-admin/.ssh/authorized_keys
chown -R server-admin:server-admin /home/server-admin/.ssh
Step 8: set root password
When asked for password, use output from openssl rand -base64 24 (and store password in password manager).
passwd
Step 9: log out
exit
Step 10: log in as server-admin
Replace 185.112.144.30 with IP of server.
ssh server-admin@185.112.144.30 -i ~/.ssh/server
Step 11: switch to root
When asked, enter root password.
su -
Step 12: update SSH config to disable root login and password authentication and restart SSH
sed -i -E 's/(#)?PermitRootLogin (prohibit-password|yes)/PermitRootLogin no/' /etc/ssh/sshd_config
sed -i -E 's/(#)?PasswordAuthentication yes/PasswordAuthentication no/' /etc/ssh/sshd_config
systemctl restart ssh
Step 13: update APT index and upgrade packages
Update APT index
apt update
Upgrade packages
apt upgrade -y
Step 14: install and configure Vim
Install Vim
apt install -y vim
Configure Vim
cat << "EOF" > ~/.vimrc
set encoding=UTF-8
set termencoding=UTF-8
set nocompatible
set backspace=indent,eol,start
set autoindent
set tabstop=2
set shiftwidth=2
set expandtab
set smarttab
set ruler
set paste
syntax on
EOF
Step 15: set timezone (the following is for Montreal time)
See https://en.wikipedia.org/wiki/List_of_tz_database_time_zones for available timezones.
timedatectl set-timezone America/Montreal
Step 16: install iptables-persistent
When asked to save current IPv4 or IPv6 rules, answer Yes.
apt install -y iptables-persistent
Step 17: configure iptables
iptables -N SSH_BRUTE_FORCE_MITIGATION
iptables -A SSH_BRUTE_FORCE_MITIGATION -m recent --name SSH --set
iptables -A SSH_BRUTE_FORCE_MITIGATION -m recent --name SSH --update --seconds 300 --hitcount 10 -m limit --limit 1/second --limit-burst 100 -j LOG --log-prefix "iptables[ssh-brute-force]: "
iptables -A SSH_BRUTE_FORCE_MITIGATION -m recent --name SSH --update --seconds 300 --hitcount 10 -j DROP
iptables -A SSH_BRUTE_FORCE_MITIGATION -j ACCEPT
iptables -A INPUT -i lo -j ACCEPT
iptables -A INPUT -p tcp --dport 22 --syn -m conntrack --ctstate NEW -j SSH_BRUTE_FORCE_MITIGATION
iptables -A INPUT -m state --state RELATED,ESTABLISHED -j ACCEPT
iptables -A OUTPUT -o lo -j ACCEPT
iptables -A OUTPUT -p tcp --dport 53 -m state --state NEW -j ACCEPT
iptables -A OUTPUT -p udp --dport 53 -m state --state NEW -j ACCEPT
iptables -A OUTPUT -p tcp --dport 80 -m state --state NEW -j ACCEPT
iptables -A OUTPUT -p udp --dport 123 -m state --state NEW -j ACCEPT
iptables -A OUTPUT -p tcp --dport 443 -m state --state NEW -j ACCEPT
iptables -A OUTPUT -m state --state RELATED,ESTABLISHED -j ACCEPT
iptables -P FORWARD DROP
iptables -P INPUT DROP
iptables -P OUTPUT DROP
If the server is IPv4-only, run:
ip6tables -P FORWARD DROP
ip6tables -P INPUT DROP
ip6tables -P OUTPUT DROP
If the server is dual stack (IPv4 + IPv6) run:
ip6tables -A INPUT -i lo -j ACCEPT
ip6tables -A INPUT -p ipv6-icmp --icmpv6-type destination-unreachable -j ACCEPT
ip6tables -A INPUT -p ipv6-icmp --icmpv6-type packet-too-big -j ACCEPT
ip6tables -A INPUT -p ipv6-icmp --icmpv6-type time-exceeded -j ACCEPT
ip6tables -A INPUT -p ipv6-icmp --icmpv6-type parameter-problem -j ACCEPT
ip6tables -A INPUT -p ipv6-icmp --icmpv6-type router-advertisement -m hl --hl-eq 255 -j ACCEPT
ip6tables -A INPUT -p ipv6-icmp --icmpv6-type neighbor-solicitation -m hl --hl-eq 255 -j ACCEPT
ip6tables -A INPUT -p ipv6-icmp --icmpv6-type neighbor-advertisement -m hl --hl-eq 255 -j ACCEPT
ip6tables -A INPUT -p ipv6-icmp --icmpv6-type redirect -m hl --hl-eq 255 -j ACCEPT
ip6tables -A INPUT -m state --state RELATED,ESTABLISHED -j ACCEPT
ip6tables -A OUTPUT -o lo -j ACCEPT
ip6tables -A OUTPUT -p ipv6-icmp --icmpv6-type destination-unreachable -j ACCEPT
ip6tables -A OUTPUT -p ipv6-icmp --icmpv6-type packet-too-big -j ACCEPT
ip6tables -A OUTPUT -p ipv6-icmp --icmpv6-type time-exceeded -j ACCEPT
ip6tables -A OUTPUT -p ipv6-icmp --icmpv6-type parameter-problem -j ACCEPT
ip6tables -A OUTPUT -p ipv6-icmp --icmpv6-type router-solicitation -m hl --hl-eq 255 -j ACCEPT
ip6tables -A OUTPUT -p ipv6-icmp --icmpv6-type neighbour-solicitation -m hl --hl-eq 255 -j ACCEPT
ip6tables -A OUTPUT -p ipv6-icmp --icmpv6-type neighbour-advertisement -m hl --hl-eq 255 -j ACCEPT
ip6tables -A OUTPUT -p tcp --dport 53 -m state --state NEW -j ACCEPT
ip6tables -A OUTPUT -p udp --dport 53 -m state --state NEW -j ACCEPT
ip6tables -A OUTPUT -p tcp --dport 80 -m state --state NEW -j ACCEPT
ip6tables -A OUTPUT -p udp --dport 123 -m state --state NEW -j ACCEPT
ip6tables -A OUTPUT -p tcp --dport 443 -m state --state NEW -j ACCEPT
ip6tables -A OUTPUT -m state --state RELATED,ESTABLISHED -j ACCEPT
ip6tables -P FORWARD DROP
ip6tables -P INPUT DROP
ip6tables -P OUTPUT DROP
Step 18: log out and log in to confirm iptables didn’t block SSH
Log out
exit
exit
Log in
Replace 185.112.144.30 with IP of server.
ssh server-admin@185.112.144.30 -i ~/.ssh/server
Switch to root
When asked, enter root password.
su -
Step 19: make iptables rules persistent
iptables-save > /etc/iptables/rules.v4
ip6tables-save > /etc/iptables/rules.v6
Step 20: install Borg
apt install -y borgbackup
Step 21: configure borg’s SSH authorized keys
Switch to borg
su - borg
Create .ssh folder
mkdir -p /home/borg/.ssh
Create /home/borg/.ssh/authorized_keys using heredoc generated at step 3
cat << EOF > /home/borg/.ssh/authorized_keys
command="borg serve --append-only --restrict-to-repository /home/borg/backup --storage-quota 10G",restrict ssh-rsa AAAAB3NzaC1yc2EAAAADAQABAAABgQDawvaD0JmNz3XBChQq9OZROa0psAwH0BpHwGZ/4cuDiTnU8gt3gYXDANkS++SKbUNMJCQW3QgVNFhpk2SmWA8lLvlpuD5J3kvHNFNKFv/hBc0XxsVJlpASONeCwilnS5otIqnDT0+KFMOevZUMCumEoBtjQ3IQbGkpWgf3NJ6ysXkt6kLRk7PMls4E733v/T4XUJmeBWT6B0rECqWE3aFzrjjZbfyJho0Pp8VzjT3m4vknNCvvwionjXRti5ObvEo3OZGWQbuhwW63JPS+aldNX9Xo0VC8t2UuSzzy7OeGI+JB76Pw1RYfXaMeflHry3O50kCIWIWHPNblw0sBPBsRs9BDg4R8urwpdVYjyirw9cZHDA8lkPxh0WS3IbA7Q1iRlVrfJkm9r4SqohxwQUeHIT7lpsyDHObUDF3KejRCWtyCqabPJVHqvGIds6rjQQo9lP5JNkeHg+qg8Cw61FihGLrlFStvgx1pMbBo2TvMEsRo65psVYUyi79taqbdlZM= borg"
command="borg serve --restrict-to-repository /home/borg/backup --storage-quota 10G",restrict ssh-rsa AAAAB3NzaC1yc2EAAAADAQABAAABgQCowL4nNnu5Ca3ixlMxD6vVUexhx7M214ElheY/Y3K1mGavd5H6ynhkF71DAgI3YOB3B9KM/IzvV+8ioY+FUVlovBrKwqXzBwb5fnAGPjymjRMY93nYVExICHjI6aQX+9CG1WxRMPhZpDo51sKXORpWQDbMG+CfDa5nmjVjysoCdqwJfd22WEDFIXTiUdVXC5EvJBWiC0MUAphRPmNF/fXyaZPoiL1RmNX7h6JsMQJC/iWHwYgQZhzQCuoAOnvEXKUnu6s7FEUOSbqHCnOuHzxVkDHg1yy667hhyOuwkPdUW276T44GgwicSg/T2IWmwf5cBmDzaSr21kaM00zeg+stqkIwKqdpd0PhV8tjIdKCm3H9GsCRpE0erXLhJVsQTjmmFaodvFyroRHeyH9VBqzYrJXMhG/iXwK8uCeOwGFUosddYw3jJ3sLgsRI34oGKSq9HIRd7P5gdxUZ8cJiZUCpfS4vI4cZDkyR5D8Xvupe/X2pS5Llc8wtiy1K3nxIEQE= server"
EOF
Heads-up: the following steps are done on Mac.
Step 22: download and install FUSE for macOS
Go to https://osxfuse.github.io/, download and install latest release.
Step 23: install Homebrew
/bin/bash -c "$(curl -fsSL https://raw.githubusercontent.com/Homebrew/install/master/install.sh)"
Step 24: disable Homebrew analytics
brew analytics off
Step 25: install Borg
brew install borgbackup
Step 26: configure Borg
Generate Borg passphrase using openssl and add passphrase to “Keychain Access”
security add-generic-password -D secret -U -a $USER -s borg-passphrase -w $(openssl rand -base64 24)
Initialize Borg repo
Replace 185.112.144.30 with IP of server.
$ export BORG_PASSCOMMAND="security find-generic-password -a $USER -s borg-passphrase -w"

$ export BORG_RSH="ssh -i ~/.ssh/borg"

$ borg init --encryption=keyfile-blake2 "borg@185.112.144.30:backup"

By default repositories initialized with this version will produce security
errors if written to with an older version (up to and including Borg 1.0.8).

If you want to use these older versions, you can disable the check by running:
borg upgrade --disable-tam ssh://borg@185.112.144.30/./backup

See https://borgbackup.readthedocs.io/en/stable/changes.html#pre-1-0-9-manifest-spoofing-vulnerability for details about the security implications.

IMPORTANT: you will need both KEY AND PASSPHRASE to access this repo!
Use "borg key export" to export the key, optionally in printable format.
Write down the passphrase. Store both at safe place(s).
Backup ~/.config/borg and ~/Library/Keychains folders
Heads-up: both key (stored in
~/.config/borg) and passphrase (stored in~/Library/Keychains) are required to decrypt backup.
Step 27: set temporary environment variables
Replace 185.112.144.30 with IP of server and set backup name.
SERVER_IP="185.112.144.30"
BACKUP_NAME="$USER-macbook-pro"
Step 28: create /usr/local/bin/borg-backup.sh script
cat << EOF > /usr/local/bin/borg-backup.sh
#! /bin/sh

set -e

repo="borg@$SERVER_IP:backup"
prefix="$BACKUP_NAME-"

export BORG_PASSCOMMAND="security find-generic-password -a $USER -s borg-passphrase -w"
export BORG_RSH="ssh -i ~/.ssh/borg"

borg create \\
  --filter "AME" \\
  --list \\
  --stats \\
  --verbose \\
  "\$repo::\$prefix{now:%F-%H%M%S}" \\
  "/Users/$USER/.gnupg" \\
  "/Users/$USER/.ssh" \\
  "/Users/$USER/Library/Keychains"

printf "%s\n" "Done"
EOF
chmod +x /usr/local/bin/borg-backup.sh
Step 29: edit /usr/local/bin/borg-backup.sh script
vi /usr/local/bin/borg-backup.sh
Step 30: create /usr/local/bin/borg-list.sh script
cat << EOF > /usr/local/bin/borg-list.sh
#! /bin/sh

set -e

prefix="$BACKUP_NAME-"
repo="borg@$SERVER_IP:backup"

export BORG_PASSCOMMAND="security find-generic-password -a $USER -s borg-passphrase -w"
export BORG_RSH="ssh -i ~/.ssh/borg"

borg list --prefix "\$prefix" "\$repo"

printf "%s\n" "Done"
EOF
chmod +x /usr/local/bin/borg-list.sh
Step 31: create /usr/local/bin/borg-prune.sh script
cat << EOF > /usr/local/bin/borg-prune.sh
#! /bin/sh

set -e

prefix="$BACKUP_NAME-"
repo="borg@$SERVER_IP:backup"

export BORG_PASSCOMMAND="security find-generic-password -a $USER -s borg-passphrase -w"
export BORG_RSH="ssh -i ~/.ssh/server"

borg prune --keep-daily 7 --keep-weekly 4 --keep-monthly 12 --list --prefix "\$prefix" --stats "\$repo"

printf "%s\n" "Done"
EOF
chmod +x /usr/local/bin/borg-prune.sh
Step 32: create /usr/local/bin/borg-restore.sh script
cat << EOF > /usr/local/bin/borg-restore.sh
#! /bin/sh

set -e

function umount()
{
  if [ -d "\$mount_point" ]; then
    borg umount \$mount_point
  fi
}

trap umount ERR INT

mount_point="\${TMPDIR}borg"
prefix="$BACKUP_NAME-"
repo="borg@$SERVER_IP:backup"

mkdir -p \$mount_point

export BORG_PASSCOMMAND="security find-generic-password -a $USER -s borg-passphrase -w"
export BORG_RSH="ssh -i ~/.ssh/borg"

borg mount --prefix "\$prefix" "\$repo" "\$mount_point"

open \$mount_point

printf "Restore data and press enter"

read -r answer

umount

printf "%s\n" "Done"
EOF
chmod +x /usr/local/bin/borg-restore.sh
Step 33: install Borg Backup
Go to https://github.com/sunknudsen/borg-backup/releases and download latest .dmg release (PGP public key)
Double-click .dmg release and drag and drop “Borg Backup” to the “Applications” folder
Step 34: create /usr/local/var/log folder
mkdir -p /usr/local/var/log
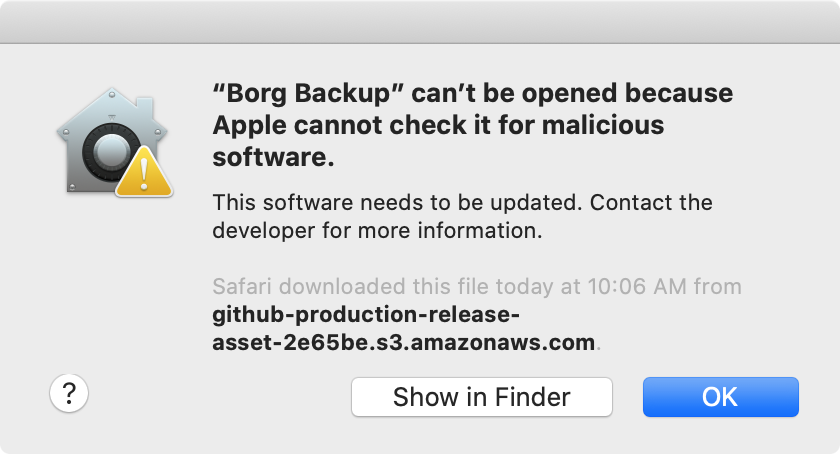
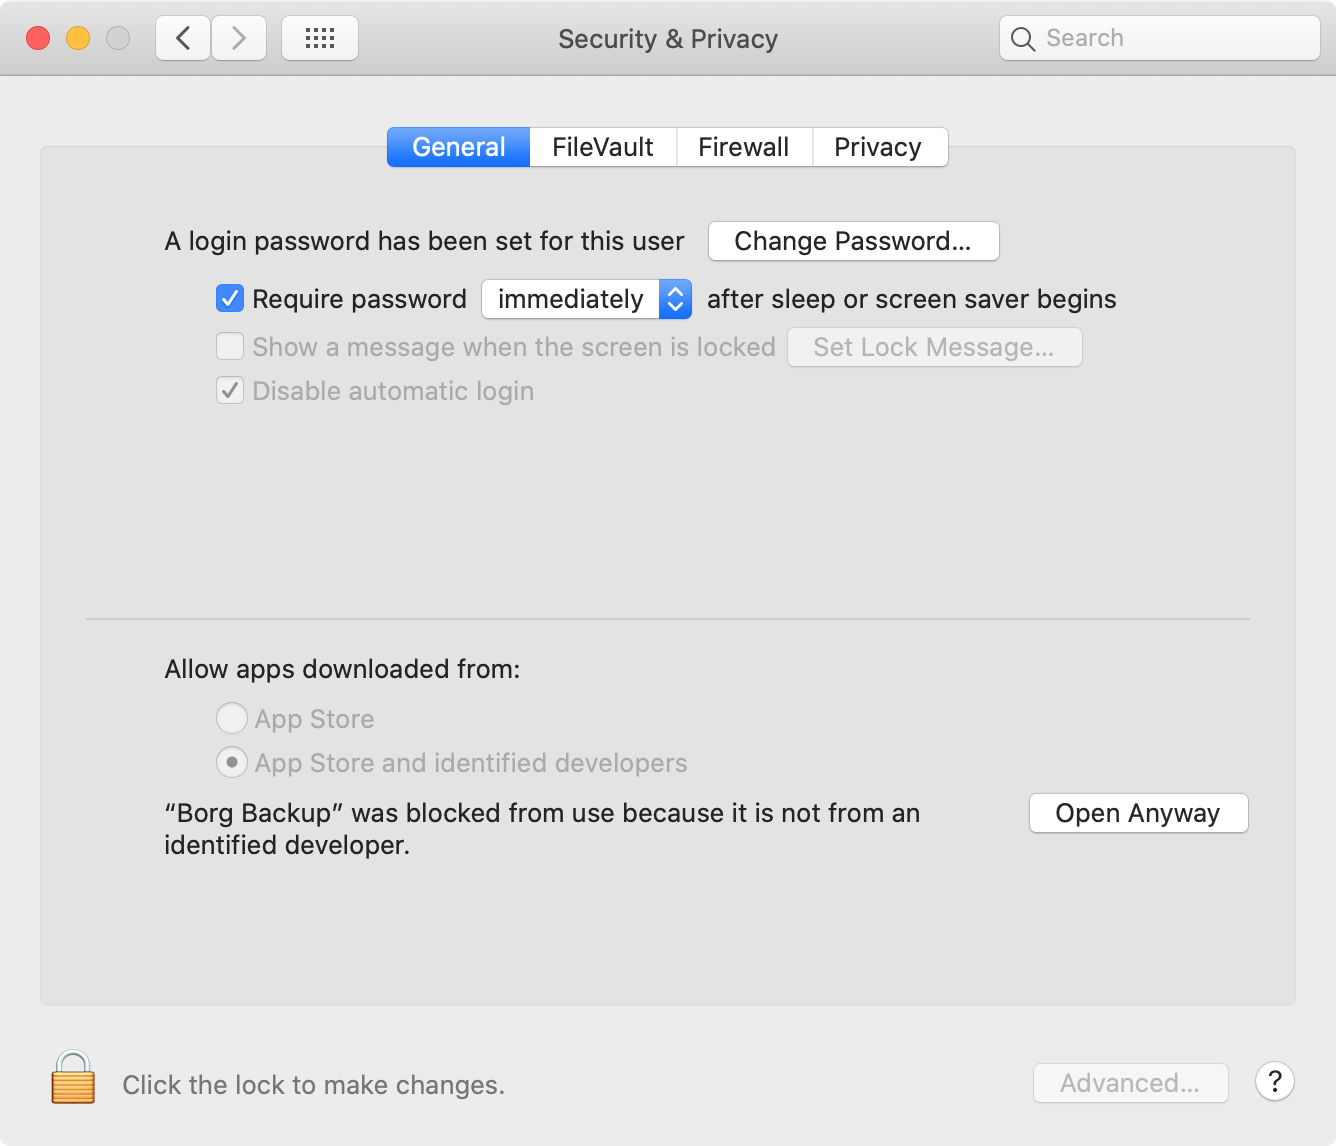
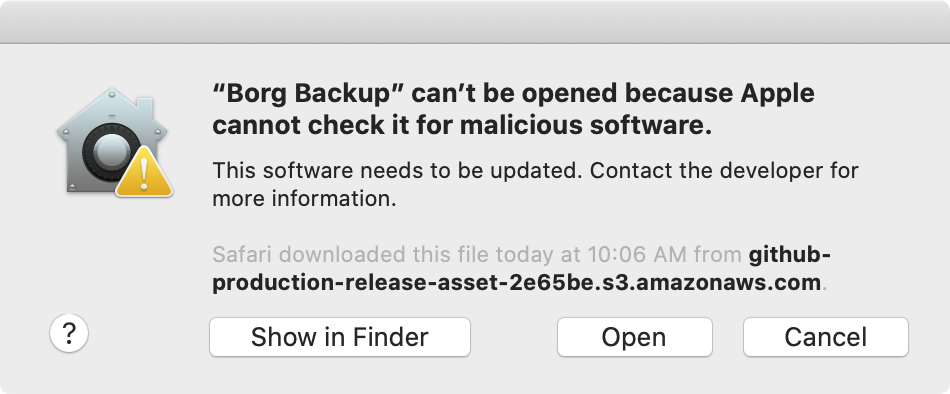
Step 35: run “Borg Backup”
open /Applications/Borg\ Backup.app
Heads-up: given “Borg Backup” is developed outside the Apple Developer Program, macOS prevents opening the app without explicit user consent (clicking “Open Anyway” in “System Preferences” / “Privacy & Security”).
Step 36: schedule backup every hour using launchd
mkdir -p ~/Library/LaunchAgents
cat << EOF > ~/Library/LaunchAgents/local.borg-backup.plist
<?xml version="1.0" encoding="UTF-8"?>
<!DOCTYPE plist PUBLIC "-//Apple//DTD PLIST 1.0//EN" "http://www.apple.com/DTDs/PropertyList-1.0.dtd">
<plist version="1.0">
  <dict>
    <key>Label</key>
    <string>Borg Backup.app</string>

    <key>ProgramArguments</key>
    <array>
      <string>open</string>
      <string>/Applications/Borg Backup.app</string>
    </array>

    <key>RunAtLoad</key>
    <false/>

    <key>StartCalendarInterval</key>
    <dict>
      <key>Minute</key>
      <integer>0</integer>
    </dict>
  </dict>
</plist>
EOF
launchctl load ~/Library/LaunchAgents/local.borg-backup.plist
Usage guide
Backup
$ borg-backup.sh
Creating archive at "borg@185.112.144.30:backup::sunknudsen-macbook-pro-{now:%F-%H%M%S}"
A /Users/sunknudsen/Library/Keychains/4FD89B1C-70AF-58EC-8026-35E97A08F9FE/keychain-2.db-wal
Remote: Storage quota: 667.73 kB out of 10.00 GB used.
Remote: Storage quota: 671.72 kB out of 10.00 GB used.
------------------------------------------------------------------------------
Archive name: sunknudsen-macbook-pro-2020-11-12-095711
Archive fingerprint: 943420e2bfd0154a953c7dc84a6c42f1ab49888e17453df0c63518b65512d718
Time (start): Thu, 2020-11-12 09:57:14
Time (end):   Thu, 2020-11-12 09:57:15
Duration: 0.39 seconds
Number of files: 29
Utilization of max. archive size: 0%
------------------------------------------------------------------------------
                       Original size      Compressed size    Deduplicated size
This archive:                8.43 MB            666.16 kB              3.84 kB
All archives:               16.87 MB              1.33 MB            669.77 kB

                       Unique chunks         Total chunks
Chunk index:                      31                   62
------------------------------------------------------------------------------
Done
Done
👍
List
$ borg-list.sh
sunknudsen-macbook-pro-2020-11-12-095625 Thu, 2020-11-12 09:56:28 [a8f8ef592501cc240da7f000b23626a4371719565d8c9e5ce55855b1fe465742]
sunknudsen-macbook-pro-2020-11-12-095711 Thu, 2020-11-12 09:57:14 [943420e2bfd0154a953c7dc84a6c42f1ab49888e17453df0c63518b65512d718]
Done
Done
👍
Prune
$ borg-prune.sh
Enter passphrase for key '/Users/sunknudsen/.ssh/server':
Keeping archive: sunknudsen-macbook-pro-2020-11-12-095711 Thu, 2020-11-12 09:57:14 [943420e2bfd0154a953c7dc84a6c42f1ab49888e17453df0c63518b65512d718]
Pruning archive: sunknudsen-macbook-pro-2020-11-12-095625 Thu, 2020-11-12 09:56:28 [a8f8ef592501cc240da7f000b23626a4371719565d8c9e5ce55855b1fe465742] (1/1)
------------------------------------------------------------------------------
                       Original size      Compressed size    Deduplicated size
Deleted data:               -8.43 MB           -666.16 kB             -3.84 kB
All archives:                8.43 MB            666.16 kB            665.93 kB

                       Unique chunks         Total chunks
Chunk index:                      29                   31
------------------------------------------------------------------------------
Done
Done
👍
Restore
$ borg-restore.sh
Restore data and press enter
Done
Done
👍